Wednesday, July 1, 2015

Salmon with a Thai Twist.


With citrus currently being in season, I, naturally, as everyone does, acquired a 2kg bag of lemons from someone with a lemon tree. Which left me with the conundrum of what do you do with lemons that isn't a dessert, like lemon cheesecake, or a lemon tart or lemon custard or... I made a lemon sauce. That is what this whole dish boils down to really, I had a lot of lemons and needed to use them and ... the magics happened!

For convenience, I'll be splitting the recipe and ingredients into each of the components.


Sunday, September 21, 2014

Medieval Feast - So much baking, party, food! So much food.

Whew! It's been a busy as all get out couple of days for me! And first of all I would like to give this disclaimer; I am not a baker. So when I offer you baked stuff (like cakes, tarts, bread) and it's -not- messed up? It's awesome! And to all people who bake for a hobby and enjoy the chemistry that is cake, I am sorry for doing things the wrong way and likely making you cringe. On that note, look at this masterpiece of a cake, that I demand people get messy eating.

Also, advice; get yourself one or two people to help you! It will be a -godsend-.


Sweet Cake Glory! It's almost Pinterest worthy!

Friday, September 12, 2014

'Medieval' Feast - Preparation


Have you ever wondered how those huge banquet feasts were done? Or was it a case of "I'd rather eat this but good lord it is a lot of work to prepare!" and your great untapped reserves of food awesome go ... well, untapped?

No! I say, they shall not remain untapped and I will rise to the cooking station and make a feast! Why? Because I like to cook. And cooking is fun. But, I understand that not everyone has the same delight in cooking, and the idea of preparing a 'feasts' worth of food makes hearts quail and eyes grow large with the anime-esque sweatdrop of nerves down the brow.

I'm rolling up my sleeves, and taking the trauma out of preparation and the cooking process. It is, after all, what this blog is for. To de-mystify recipes, to hopefully, help people make sense of the procedure and how to turn out glorious bits of food from everything and anything in the pantry and fridge. As of writing this,  I have not, yet, actually -made- my feast, so if it doesn't work too well, you'll find out when I do!

Let us begin...


Wednesday, July 16, 2014

Teriyaki Salmon with Siracha Cream Sauce and 'dirty' Fried Rice.


Oh. My. God. Okay, so I was browsing for salmon recipes or things to do with salmon, and I came across a pinterest recipe of the salmon and siracha cream sauce. It looked stunning (as they always do) and ...mine does not look as stunning but it tastes AMAZING. It is lovely and you really cannot go wrong. I know the ingredients list is a little daunting, but most of it is simply 'put it all in a pot'. Super straight forward.

Monday, April 14, 2014

Baked Lemon Cheesecake

A bit of history for you, and context; I can't bake. If it involves something with flour, I am utterly lost and useless and it just ...doesn't work. Pasta-dough, cakes, scones, pastry ... nada. Even packet-mix cake mixes end up dry and horrible and just ...yeah. I can't bake. I'm a cook, not a baker. This however, worked, and worked well. I know baked cheesecakes are not for everyone, but they're really easy.


Friday, April 4, 2014

Chicken Nuggets and Shredded Salad

Picture this. Your kids are hounding for chicken nuggets. They want chicken nuggets and they want them naaaaaaaaow. And you, being the concerned, health-conscious parent don't want the little darlings to eat the deep fried crap, but crumbing things is like a whole other language and it never stays on the meat you want it to stay on. Oh god. Well! Never fear! Here are some delicious crumbed chicken nuggets that are healthy, and will have your kids raving. (Or at least, had those I subjected them to scoffing them down like woah). Feeds 3-4ish.


Monday, March 24, 2014

Stuffed Potatoes of Woah

This is something you make when you're -really- hungry, and want to chop things up. A lot of things to chop up, to tell the truth, as there is two parts to this recipe. There's a coleslaw, and the ...well... rest of it. But so worth it. So very worth it. Serves 2-4


Monday, March 17, 2014

Lightly Spiced Oriental-style Crab Soup

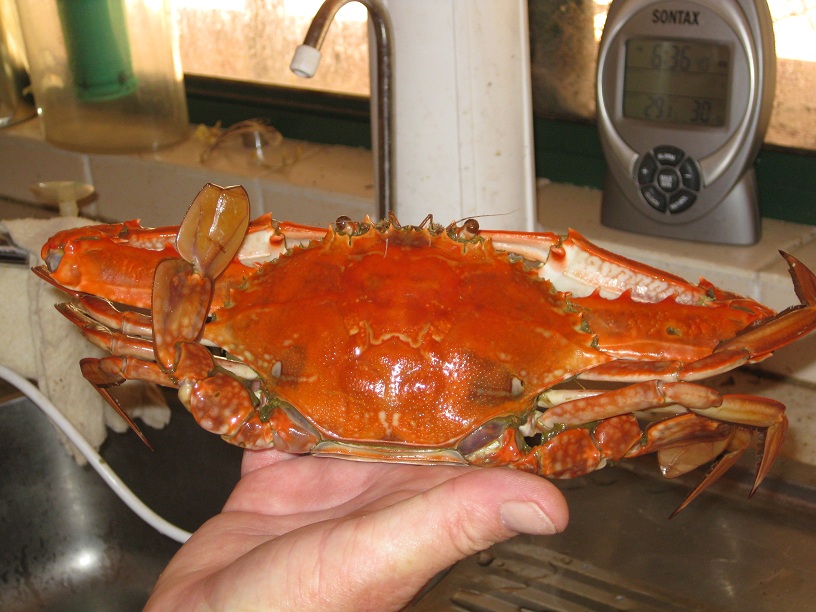
This weekend just gone has had a Crab Festival. Which means crabs EVERYWHERE at the festival and at $5 a crab I splurged and bought 16 of the things, figuring that oh, there'd be 3 spare at the end of it. Nuh-uh. I have 9 spare. 2 more went off to other people. What am I going to do with 7 crabs? Eat them, naturally, but shellfish has a short shelf-life, once it's thawed (by the time I'd gotten them home, yup they'd thawed) so... what to do with crab other than just ...eat it? I made a Crab Soup. Oriental style.

I was gonna show you a picture, but my camera is flat :(

Sunday, February 17, 2013

Mutton/Lamb Sticky Sweet Stuff

This came about because I had a whole pineapple, and six cutlets of mutton (that's older/adult sheep, has a fuller flavour than lamb), and three people to feed. Had to use the pineapple, because it was ripening happily on the sink, and was getting to the point of being nearly over ripe so... I tried making a sauce-y type marinade without actually marinading. The fresh pineapple can probably be replaced by drained, tinned pineapple, NOT in syrup though! That would be waaaay too sweet.


Saturday, October 13, 2012

Tuna salad and coleslaw


What to cook when you don't feel like really cooking and more just 'throwing things together'. A nice, cool dinner for the warmer nights of heading into summer :)


Tuesday, October 9, 2012

Where have I been?


Where oh where have I been? I know I promised that I would update once, or twice a week, or at least try to! And then I up and vanished! What happened? Well, this happened.


Tuesday, July 31, 2012

Tuna Mornae


Whew! Talk about busy! A broken ankle on the 20th of May put a hiatus on my culinary explorations, and just getting back into the swing of things. Thus, we have our next choice up for deliciousness desired! Tuna Mornae.

It's heavy, and thick and very delicious and high in nutrition, the sort of meal you'd have when starving hungry, chew on the floorboards starving, and then go off to do some heavy lifting, or something. It'd get you through the lot! For this, you will need:

1-2 ~500g of tuna tins (a good brand, preferably, in brine not oil or anything. Springwater works too)
1 cup of frozen peas
1 cup of frozen corn
250g dried pasta; shells, macaroni, twists, the short pasta types
250-400g cheddar cheese (grated)
100g parmesan cheese (grated)
3-4 cups of milk
3/4th cup of flour
150g butter (In two batches, so 2 tsp for the potato, the rest for the sauce)
4-5 decent sized nadine (white) potatoes, around the size of your fist.
3 cloves of garlic.
1/4 tsp siracha
2 Tbsp vegetable oil

Peel and dice the potatoes, peel the white papery bit off of each of the garlic cloves, chop off the 'dry' end, that's the part of the clove that was attached to the base, or the roots, roughly slice and chop up each of the cloves. Put them in a pot with the potatoes, fill with water and put on to boil. You want the pieces of garlic to be large enough to stay in the potatoes as they get drained of water mind.

Get a larger pot fill it with water, put it on the stove to heat. Add the oil and the siracha (or hot sauce with a nice flavour) to the oil and leave it to boil. Once boiling, add the pasta, stirring to make sure it doesn't stick.

Preheat the oven to 180 degrees celcius.

Peas and corn go into the same pot, water yay! Bring to the boil. About this time your potatoes should be boiling, lift the lid to release steam, and boil for another five to ten minutes, stab a piece of potato with the tip of a knife to see if it's cooked. The potato should be SOFT. The pasta should also taste 'cooked', just a little bit raw and a hint chewy, but not soggy or gluggy or overdone.

Once the peas and corn are boiling, turn them off. Taste the pasta, if it is right, strain it out of the water, give it a quick rinse over and put it into a large baking pot. A glass thing like I have. Drain the peas and add them as well. Turn off your potato, drain them, add the butter and a little bit of milk (or a little more) and mash them until they are soft and fluffy and well.. rather sloppy. The potato is going to be a lid for the dish, which means that the solidity of the filling has to be more than the weight of the potatoes, elsewise they'll just sink.

To minimalise on cleaning up, use the pasta pot to make the sauce. While it is drying and cooling slightly from having hot water and pasta in it, grate the cheese.

Once the cheese is grated, put the rest of the butter in the what was a pasta pot, turn it onto heat, and wait for the butter to melt but -not- bubble. Add the flour one teaspoon or so at a time, stirring it into the butter until they look like a dough, add the last of the flour and stir, rolling the 'dough' around on the bottom of the hot pot to lightly cook it. Add the milk in SLOW measurements. A tablespoon or two at a time, just enough to barely cover the base of the pot, and mix it into the dough.

You want a sauce without lumps in. Dough has no lumps. It is all solid, so what you are doing is slowly, gradually, turning the flour from a dough into a sauce by adding the milk. Once you have added all the milk, still stirring your smooth sauce, make sure that it is hot not just warm, and add your cheese. Slowly. You don't want to have clumps of cheese. (Oh, and make sure to keep some aside for later!) Stir the cheese in, making sure that each pinch or whatever amount is fully melted and stirred in before you add the next batch. Remember the corners on the bottom of the pot! Cheese is sneaky and it hides!

Once all the cheese is gone and your sauce tastes wonderful, turn off the heat. Open your tin(s) of tuna, strain out the juice by holding the lid and tipping the tin slowly, compressing the lid down to squeeze as much of it out of the fish as possible. Drink the juice. Mmmm. Delicious. (You don't -have- to, I just like to)

Put the tuna into the bowl with your pasta and peas, make sure that it is broken up into flakes, and stir it through, making sure to spread the peas and corn through as well. Add the sauce and stir again, slowly, careful not to make a mess. Add the mashed potato last, smoothing it out over the top so that it is a nice lid, sprinkle with grated cheese and put in the oven (remember, you preheated it?) for around 15 minutes.

The primary point of this is to melt the cheese and reheat the food in there that may have gotten cold, or was never hot to begin with.


Pull the thing out of the oven, and leave it to rest for 5 -10 minutes or so, until the cheese stops bubbling with the fury of a thousand suns! Get out plates, and serve. Yum!

Works great as leftovers too, since it is so filling it is HIGHLY doubtful you'll eat all of it in one hit!

Deliciousness, Delivered. 

Friday, May 4, 2012

Damper


Have you ever wondered how the ancient sort of civilisations managed to make their bread without high-tech things like yeast, or a bread maker or the HomeMaker 3000 or whatever it is that you put everything into and it stirs the mix into dough for you? I did too! So here is something that you don't need a breadmaker for, or a HomeMaker 3000 or the MixMaster Millennium (any similarity to actual products is purely coincidence) or even a food processor. This is called Damper. 

It hails from Australian's history when everything was cooked in a pot over the fire, and you really wanted to get -all- the juices from your bowl. Really simple to make, and it is traditionally done with purely drystore products -- flour and salt -- and water, however, nowadays with the invention of the fridge and freezer and easily accessed ice, there is the addition of butter. You can also replace the water with milk if you want it to be extra creamy, but I stuck with the water. For this you will need:

3 cups of self-raising flour
'pinch' of salt - around 1/4th a teaspoon. Not much.
80g of butter, chilled and cubed -- roughly 1/3rd a cup
3/4 cup of water - tap water does fine.


Dump your flour and salt into a bowl, and add the butter (there's actually more flour than visible here, I only added half at first whoopsie) and break up the butter with your hands. If you have little ones that loooooove to help you bake, put them onto this task, making sure hands are clean and all that! What you need is for it to be resembling fine breadcrumbs. How do you tell that, I hear you ask? Tada!


Illumination! Basically it should -look- crumbly and incomplete and kinda powdery or crumbly, but if you scoop up a palmful it should stick together -- slightly -- and fall apart again. Similar to a good bit of damp sand, perfect for throwing at someone. 


Add the water, mix it in initially with a butter knife or spatula. Why? I hear your disbelieving snorts, as to why it would be preferable than to use a spoon? Simple. It harks back to the days of yonder before there were such things as cake mixers and electric beaters. A round tipped or 'blunt' knife gets air into the mix much more effectively than a spoon, because a spoon scoops, and shifts the dough all of a piece, however the knife mixes in the liquid, while leaving air-pockets. Saves your arm and makes it very fluffy!


Once the majority of the water is mixed in, then you knead it with your hands, shaping it out onto a lightly floured surface -- baking paper works wonderfully for this -- until it is smooth, elastic and looks like ...well... dough. Shape it into a round disk, and score it with a sharp knife into eight sections, lightly flour the surface. 

Now, you can either put your damper onto a tray and bake it in the oven for 20-30 minutes on 200 degrees Celcius, or, if you don't have an oven handy, build yourself a fire, in a hole, and make sure there are LOTS of coals. Wrap your damper up in foil, bury it in the ash for half an hour or so, and dig it up again. Nice, hot, crisp on the outside damper. 

If you go the oven method, try the traditional route, make your family a soup, or stew, and while everyone is eating, cook the damper, so that when the plates are being emptied, any lingering nibbles are solved by fresh, hot damper! 

It doesn't last much beyond that first meal mind, and tastes best when eaten hot. But! No preservatives, or artificial things. Lovely, simple, and a way to fill the belly when you're low on funds. Butter and self-raising flour, $7 and you have quite a bit of bread to fill your belly! Still hot the butter melts in ...cream, or jam works just as well! Like a really large scone, really. 

Deliciousness Delivered.


Friday, April 27, 2012

ICanhascheezburger macaroni


Mmmm. This turned out -much- better than I had expected! It is filling, and a little bit addictive, which is the downside, but oooh so good. For a simple lazy I-don't-know-what-to-cook meal. For this you will need:

500g beef mince
1 cup of cheddar, grated (around a 2-3cm thick slice)
1/2 cup parmesan cheese, finely grated (the smaller holes)
2 garlic cloves, finely diced
1/2 tsp minced ginger
1/4 tsp onion salt
1/4 tsp siracha hot sauce
1 tsp bonox (beef stock paste)
1 tsp worchestershire sauce
2 tsp tomato sauce
1 tsp oregano, mixed herbs, onion salt
2 tsp parsley
3-4L of water
1 Tablespoon of oil
2-3 handfuls ...uh, around 1 1/2 cups of macaroni
500ml of milk
2 Tablespoons of flour
2 Tabelspoons of butter.

I know I know, it looks like a -lot- of ingredients, but really, it's very simple.

Fill up a medium sized saucepan/pot with water and oil, and the siracha sauce. This is going to have your macaroni in it, but you don't put it in yet, the water has to boil first! The mince goes into a frying pan/skillet/saucepan, with a spray over of oil, so that it doesn't stick. Break it up with a spoon, and brown the meat off.

While it's cooking, chop the base off of your garlic cloves, peel off the papery shell, slice and dice the two cloves into teeny pieces. Make a space in the pan with the mince, put the cloves in. Fry them lightly for ten to fifteen seconds -- basically as long as it takes you to put the ginger in -- and stir it through the meat.

Add the bonox, the herbs, onion salt, worchestershire sauce, tomato sauce (ketchup) and parsley, stir through, add a half cup of water to the mix, stir it through so that the seasoning is evenly mixed through the mince. Leave to simmer on low heat while the water for the macaroni reaches the boil.

When that is bubbling away happily, grate your cheeses, get out a smaller saucepan, and melt your butter in the bottom, over low heat. Add the flour, stirring to lightly toast it. Add the milk a little bit at a time, stirring constantly. If you have issues getting lumps out of the sauce, use a whisk. It can only be used for the flour part of the mixture. Bring the milk temperature up to warm or hot, -without- boiling, and add the cheese a half-handful to handful at a time, crumbling it over the hot milk as you stir.

Once the sauce has thickened -- it should still be fairly thin though, so that you can mix it in with the rest so less cheese is better, or more milk -- leave it to rest, as you strain the water out of the macaroni, mix the meat in with the pasta, serve it into a bowl (or two, depending on how many you are feeding) and top with the cheese sauce.

The more people you are feeding, the more pasta you cook. ~1 handful per person, cupped, for me and my father, I had 2 and a half handfuls.

Deliciousness Delivered.

Monday, March 26, 2012

Prawn Cocktails


Yum yum prawn cocktail! I don't know about you, but these are one of the things I look forward to the -most- when I go to an asian restaurant for some 'exotic' dining. Exotic in that I have no idea how they manage to make half of the delicious things they do. I'm having a very ....asian themed cooking thing at the moment, thus, prawn coctail! For this you will need:

400g of prawns, frozen, raw and peeled. Make sure that they are such, and not 'cutlets', prawn cutlets still have the shell on the tail. Add or reduce as determined by how many people you are serving. Around 9-13 decent sized prawns per person.
1 tsp of butter
2 cloves of garlic
1-2 leaves of iceburg lettuce
1 1/2 TableSpoons of Mayonaise
1-2 tsps of tomato sauce
1/2 tsp of worchestershire sauce.

Peel the papery shell off of the garlic, chop off the 'hard' end -- that's where the head of garlic used to be -- slice and dice and chop both of the cloves into small pieces, the smaller the better, as it lets more of the garlic's oil out to flavour the prawns.

The butter is purely to stop the prawns (or shrimp, I guess, but they are TINY) from sticking to the bottom of the frying pan. Fill said pan up with the prawns, making sure that they're fairly evenly spread out, and put the lid on. Walk away! ...Nigh literally. You only have to stir them periodically, to make sure that they're not sticking. They start out grey in colour, so how do you know when they're cooked? When they're all pink!


See? In the process, there are little pink bits from where I've stirred. Don't be alarmed if you end up with a LOT of water in the pan. It's come out of the prawns as they've thawed, and it's not like you're making a sauce with the water and butter :)


When your prawns are around 3/4ths cooked you can start preparing the sauce and garnish for your prawn cocktails. The mayonaise, worchestershire sauce and tomato sauce, remember that you want it to be a fairly pale pink colour, so tailor the mixes of liquid colour accordingly! Not muuuuuch worchestershire sauce. In the first mix, it was too dark so I added more mayonaise, thusly;


Cocktail sauce mixed, slice up the lettuce leaves. For this, put the smaller inside the larger, fold and wrap them in amongst each other like ...well... a wrap. Burrito, if you want the spanish version, and start slicing from one end -- end, not side. The smaller part of the thing. Slice it finely, so that each cut is about a half a centimetre thick, or less. Chop chop chop, and put the lettuce in two small bowls -- arranged similar to a birds nest, with walls that can let the lettuce be seen, and provides a bit of a support for the prawns.

Take said prawns off of the heat, and serve, placing them on the lettuce.


Adding the sauce last. It's best if you wait about five minutes or so, before serving up the prawns, so that they cool down a little. -- Warm lettuce is not very nice. All in all, it is quick, simple, and very easy to make, and it makes for a wonderful entree to a larger meal, or a snack for when you're not -really- hungry, but you want to eat something and it's around dinner time.

Deliciousness Delivered.

Friday, March 23, 2012

How to Shell A Crab!

No real recipe! Just practicality. Today, I shall show you how to shell a crab so you can have fun eating the crustacean!

Step one: Have a whole crab.


Step two: Remove the legs and claws.


Step three: find the 'pull here' tag.


Step four: Pull the 'pull here' tag and use it to lever the upper portion of the crab away from the lower, splitting the shell in two. Discard upper shell.


Step uh, five: Locate the gills and remove them. They are poisonous!


Step six: Wash! Run the bottom of the crabs shell under water to wash away any remaining goopy bits and clean your hands too!


Step seven: Break lower shell of crab in half, tugging off any non-meat parts that are 'excess' on the lower shell, mainly around the back legs and where the 'pull here' tag was. Arrange on a plate if you like, or just dump it, get a pair of crab claw crackers, or nut crackers, and feast!


It is easiest if you break the grippy part of the claw, and use one of the pincers to hook and fish the meat out from inside the shell. Also, if you want to catch/cook your own crab, make sure it is -alive-. The gills rot incredibly quickly and will toxify the whole crab! Yes, it has to be dropped into boiling water alive and cooked for 15-20 minutes. ....Much easier, and nicer, if you buy your crab from someone who cooked it for you!

Deliciousness Delivered!

Beef Jerky -- In the oven


Beeeeeeef jerky! -- yes yes I know it's got white powder. That's flour. This is my first attempt, and I am sharing where it worked and where I failed with you people so that you don't fail on your first attempt too! Even if the setup is -incredibly- easy.

For this you'll need:
500g beef steak (lean, preferrably, though rump does just as well)
1 tsp salt
1/2 tsp black pepper
1/4 tsp paprika
1/4 tsp cumin
1/2 tsp garlic powder
1/4 tsp cayenne pepper (or more if you want it spicy!)
~1 handful of plain flour

Preheat your oven to 90 degrees celcius -- you don't want it very hot, because the idea is to dehydrate the meat, not cook and crucify it into charred strips.

Pull out your steak, cut away as much of the fat as you can (and gristle if you got a crappy cut) and cut your beef into strips, roughly the same width, thickness and length. To unify the dehydrating times and remove as much variance as possible.


Put the spices/seasoning into a bag, add your slight amount of flour, and the meat. Hold the top of the bag closed and shake the living daylights out of it to cover the strips with the seasoning. With the flour, less is more. It is merely there to stop the seasoning from becoming overpowering and making the meat taste blech. The flour -will- cook in the oven, so you don't have to worry about the raw flour taste.

If you have a roasting tray, which has a rack above a fat catcher thing, use that as the best choice. Make sure the rack is -clean- however, lay the bottom of the tray with paper towels to catch any drips, and lay your strips of seasoned meat out on the rack, tapping off excess flour in the process. The more flour that is on the strip, the higher chance of it -retaining- moisture, and that is not what we want.


Now, you put it into the oven and 'forget' about it. This takes a LONG time. I put mine in for 3 and a half hours, and they were still a little hmm, soft in the middle. Four, five, six and some recipe's I've seen recommend 8 to 10 hours dehydrating. Either way, if you're not sure, poke them with a knife. If the meat squishes, they're not done.

Once they -are- done, take them out of the oven, and leave them to cool down completely. Then, you can eat, or seal them away. Heat introduces moisture in an airtight container, which allows bacteria to grow. If done properly, and completely perfectly, beef jerky can keep for up to two years like this. :)

Deliciousness ...almost delivered. They tasted delicious still slightly warm! Once in the container though... well, there was too much flour alas.

Chicken Noodle Soup


I know I know, it doesn't look like much! I was lazy and used instant noodles rather than pasta -- I felt insanely guilty because I managed to eat so -little- of the feast. My goodness. So much! But, spaghetti does just as well as a replacement for the instant noodles (and the recipe I was following actually -called- for that so...) but either way, it tasted really really nice.

You will need:
2 chicken breasts (around 500g of chicken)
3 cloves of garlic
1/2 a carrot
1/2 brown onion
1/2 red onion
5 spring onions (the one I used was home grown, and goodness me did it produce a lot of disks as you'll see!)
2 full sticks of celery
2L liquid chicken stock
1 tsp of butter
1 tsp of oil
1/2- 1 cup of corn
ditto for peas or any other frozen vegetable you want.


Oooh ingredients! This is for the vegetable part of your soup. What you'll want to do is put your chicken stock in a BIG pot and top it up with water, enough that all the vegetables are covered and able to move freely. Don't turn it on yet though! You don't want to cook these for very long, elsewise -everything- will taste of celery. (I'll recap this later when I actually -did- it in my cooking)

First up you'll want to slice your chicken into strips. This is easiest with a really sharp knife, and slice -along- the body of the breast, against the grain, to make sure that the raw chicken doesn't run away from you! Once you have done that, resulting in pieces around 2-3 cm wide and 5-15cm long (don't stress too much on length, so long as they're all around the same thickness and width) put the raw chicken on a plate.


Now, hygiene! Very important. Raw chicken carries with it a high risk of salmonella. This is bad for you! It'll make your belly very very unhappy with you for daaaaays. So what you need to do, and this is -essential- is after you cut raw chicken, you wash the cuttingboard, -and- knife -and- your hands in hot water and soap. You should do this every time you go from cutting vegetables to meat, or vice versa. It is not -such- a big deal with steak, or lamb, or most things not poultry, but it is very very important for chicken. So! Nice clean cuttingboard and knife and we're good to go!


Now, this is when I chopped up the vegetables. Scroll up if you want the picture! I just basically sliced and diced the onion into smaller pieces because I like my onion more for flavour than to actually -eat-, and I cut this with the thought of 'eating with chopsticks' in mind. Hence, cut your carrot in half, slice one of those halves in half again lengthwise. Put the flat side of the carrot on the cutting board and slice along the carrot to make carrot 'sticks'. Chop off the root of your spring onion, peel off any dead leaves, or 'crispy' layers on the white root of the thing, then using the back edge of your knife and keeping the tip to the cuttingboard, -carefully- slice your spring onion into disks. Your non-cutting hand should be doing the moving of the onion, so that the knife is going straight up and down. Slice two stalks of celery into roughly even pieces, removing the leaves in the process, and the stems of the leaves as well. Slice along the celery length, cutting each section into halves or thirds, depending on how wide they are. You don't -have- to use as much celery as I did, depends on your preference. It is just that celery is 'negative food', it takes you more energy to digest celery, than what you get -out- of it.

Slice and dice and mince your garlic, put the butter and oil in a fryin pan, add your chicken and garlic, stirring regularly to make sure the chicken is nicely seasoned with the garlic. Be careful though, chicken breast -does- dry out rather quickly and sneakily, so keep a closer eye on it the closer you get to serving.


Now that is what you want your vegetable pot to look like. Looots of water. Looots of vegetables! You can now put on water for the pasta -- spaghetti etc -- if you are going with the pasta route. Your chicken should be evenly white by now, about half cooked. Put the vegetables and water on to start heating up, dumping in your frozens at the same time. When this pot boils -- the bubbles are coming large and often and it's doing the bubbling sound -- that is when, ideally, you serve up the whole lot!

What I ended up doing however, is turning off the heat once the vegetables had boiled, putting on the kettle for hot water -- instant noodles, remember? -- pour half of the water into one of the cups of instant noodles, and half in the other cup, topping both up with the hot water, and the seasoning, putting the vegeables in while I left it for the three to four minutes, turned off the heat for the chicken as well.

Once the time was up, chicken went into the top of the cup, and it was served!

Yummy, lazy chicken soup! No seasonings or anything other than the stock and garlic. :)

Deliciousness Delivered. (kinda, I don't really like soup -_-)

Tuesday, March 13, 2012

Turkey Buffalo wings!

No picture this time, alas, because I didn't think of sharing this until -after- they were eaten. Bad me!

It's really rather simple though, as I have already covered the buffalo wing sauce here: http://deliciousnessdesired.blogspot.com.au/2011/12/buffalo-mash-of-deliciousness.html

Except instead of using chicken wings, I used turkey. Oh my goodness. So big! And due to the huuuuuuge size disparity, it is slightly difficult to find something appropriately sized to marinade the wings in. I went back to what the original recipe had, as my 'marinade' being a sauce. You will need:

1.2kg of turkey wings (around 4)
Buffalo Sauce
1/4 tsp cayenne pepper
1/2 tsp garlic powder
1/2 tsp worcestershire sauce (a generous galooping)
1/2 tsp tabasco sauce
6 Tbsp chilli sauce -- I used Siracha. I recommend you use less if you are not fond of the spice. This thing ambushes!
6 Tbsp sweet chilli sauce -- A decent sort, that has flakes of chilli and the seeds visible in the mix. Alternatively, one hot chilli, sliced with half the seeds retained whole, and
6 Tbsp of honey. Less or more depending on how flaming you want this.
Seasoning
1 cup of flour
2-3tsp of garlic powder
1/2 tsp of powdered chicken stock.
Blue cheese dip
3 tsp of sour cream
1 1/2 tsp of light mayonaise
1 tsp garlic powder
2-3 tsp finely grated blue cheese (strongly flavoured)

Toss all the sauce ingredients in together -- that's from the cayenne pepper to the honey -- and mix them in a bowl until well combined. Or straight into a small pot, to heat them up and blend the mixture nicely, this is the last thing you do, the heating by the way. So the bowl is fine to set them aside for safe keeping.

Put the flour, extra garlic powder and chicken stock on a dinner plate, mix them in together and then place one wing at a time on the flour mix. Rub it thoroughly into the skin and flesh, ensuring you get all the folds and sneaky places. Preheat your oven to 180 degrees celcius (I -think- that is 270 farenheit, but don't quote me on that) while you finish rubbing this flour stuff into the skin.

Line a tray with aluminium foil, two or three layers if you don't want to wash the tray -- which is really the idea -- and put your floured wings in the tray, tapping off the excess flour back onto the plate.

Put them in the oven for 30 minutes per side. Chop up and make a garden salad, if you desire, lettuce, tomato, cheese, carrot, cucumber, while you're waiting for the wings. Heat up your sauce, when the oven dings for the last time, take the wings out, leave them to rest as you set up the other food for preparation -- You can also make the blue cheese sauce.

To do this you get a -small- bowl, one for teeny little things, put the mayonaise, sour cream and garlic powder in, mix them together. Grate the blue cheese, using the smallest holes -- the ones you use to get skinny spiral curls of parmesan cheese, rather than the normal ones for cheddar -- and mix this into the sour cream mixture. You can add more, or less cheese depending on your taste preferences, but the whole thing should be smoothe and delicious looking, like a professional made it! ...All because you grated the cheese, rather than breaking off the crumbly stuff.

Salad, sauce, dip, wings, and extra plates for it all go on the table, and it's self serve of deliciousness! I'm not sure if I slightly overcooked the turkey, or if it was the flour, but the skin was deliciously crunchy and mmmn, so good. This'll serve about 4, one turkey wing per person, added with the salad, is more than enough to satisfy. ...Sure you'll be a little nibbly, but that is good, means you're not over full! And if you want more, have more salad. Tastes good either way!

Deliciousness Delivered.

Monday, February 27, 2012

Lamb and Stuffed Spuds


Well! Here we are again, a lovely new recipe for everyone to enjoy. I do apologise for not uploading as much, but hey, I have to try things out and get them -right- before subjecting you guys to their deliciousness. This recipe, for instance, is VERY nice. A teensy bit fattening, and bad for you, but, only a small amount. This is lamb chop and vegetable stuffed potatoes.

For this you will need:
1 lamb chop per person
1-1 1/2 potatoes per person (depends on the size of the potato. I was feeding two, so three spuds, two medium-small and one large)
1/2 cup finely diced zuccini
1/2 cup carrot (around half a carrot)
1/2 large brown onion (or 1 whole small brown onion)
1 1/2 tsp sour cream
1 tsp butter
1/4 cup of milk
1 spring onion
1 small tomato
1/2 cup grated cheddar cheese

First off, because I try to make things as easy as possible, grab yourself a bowl, and your potatoes. Stab your potatoes with a fork, once or twice for each side, working your way around the potato. Put them into the bowl (try to fit them all into one, to save on dishes) and fill it with water so that your potatoes are half-immersed. Put it into the microwave, and cook them on high for ten minutes, pull them out, turn them over so that the -other- half is immersed, and cook them for another ten. When your microwave dings, pull them out, drain off the water, and let the things cool for about five to ten minutes.

While your potatoes are cooking, you get to go mad with the knife! No seriously. I am having a 'millions of chops for teeny fiddly things is FUN' mood lately. So! What you'll need to do is top and tail the onion, shallow slice in the side through the first layer or so, and peel off the skin. Discard. Cut the onion in half, and carefully slice and dice it. Try to make each slice and piece of the onion as small as possible. Don't worry too much if you can't do this in the initial chopping, since you can pile them up into a neat line, rest one hand on the tip of your carving knife, (on the blunt side, not where you get poked and bleed) and chop/rock the knife to completely decimate your onion.

Same thing with the zuccini, you only need a couple thin slices, two to three millimetres thick at the -most-, slice vertically through the two rounds, then horizontally to make them into teeny tiny little cubes. Top and tail and peel your carrot, if you have a full sized one, you only want to use half. Slice the carrot into disks, and then go nuts with the knife on those disks. If you can cut them up the same way you did the zuccini great! If not, don't stress. Just make sure that you have tiny little bits of carrot, not lumps. You are going to be mixing this in with mashed potato, and you don't want to go from soft mashed potato to chewing on a chunk of carrot.


Spray a frying pan, put it on low heat and toss your onion in first. Cook it until it is starting to soften and go from opaque white of raw onion to the more transparent colour of cooked. Then you toss in the zuccini and carrot, and stir occasionally to fry them evenly without burning. Hopefully.

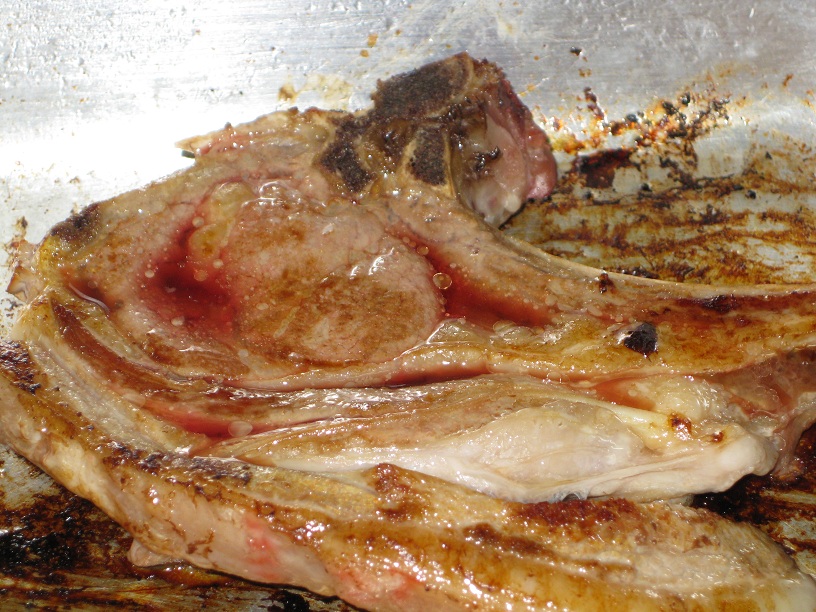
Your potatoes will be ready for their turning over now, so deal with that, and put on the lamb in another frying pan. You want the blood to rise to the surface and puddle slightly before turning over. Yes, I know, it doesn't -sound- particularly appetising but it's a way to tell how well cooked it is. Potatoes back in the microwave, the teeny pieces of vegetable are frying, and it is all wonderful. If you are especially skilled, or y'know, have the attention span of a gnat like me, wander off and do something else for a little while, just don't forget that you -do- have things cooking.

Microwave will ding a second time, take the potatoes out and drain them, as described above. Now they get to cool down! Why? Because you have to handle them! Cut each potato, once it is cool enough to touch (and providing that a testing prod with a fork has the tines sinking easily into soft flesh) cut each potato in half lengthways.


Using a dessert spoon, carefully scoop out the potato from the skins, you want to take as much as possible, without the skins losing their shape. Put the potato in a bowl, all in the same bowl, add in the butter, sour cream, and the fried bits of vegetables. Using a fork, mix and mash the potato and bits in together, adding milk about halfway through. Not too much, you want the mix to be firm, and feel more like dough, than mashed potato.


Once it is mixed through completely, and there is no milk, sour cream, or butter visible as a separate entity, carefully spoon the mash back into the skins and set them on plates.


Grate up your cheese and top and tail the tomato. Slice and dice the tomato, so that you have little tomato cubes. Push the cubes onto the potato, sprinkle the grated cheese and ...leave for a little while. Odds are your meat isn't finished cooking! Make sure the blood has risen to the surface to pool for a second time and then turn it over.


It may rise and have -slight- amounts for a third turning, to sear the juices back in. I know this may seem a little excessive, but I assure you, undercooked lamb is FOUL. Really really bleh. While beef can and apparently is eaten in all stages from raw and chasing the lettuce to old boot leather, lamb needs to be well done. Always. So, while you're waiting for the searing of the final turn to happen, pop your potatoes in the microwave, and zap on high for a minute to a minute and a half.

Peel off dead leaves, or 'crispy' bits of the spring onion, cut off the roots, and slice into round disks. Chop chop chop ding! The first lot are ready, pull them out of the microwave, put the second plate in (if you have a second plate) and do the same thing. This has the added bonus of reheating your potato mix, so you can prepare this earlier, and it doesn't -really- matter what time your potatoes are ready, because you're reheating them just before serving anyway, to melt the cheese!

Once cheese is melted, put the bits of spring onion ontop of your potatoes for garnish (and because it really brings out the onion flavour. So good) and add your lamb to the plate. Ready to serve! Yum.

You can also have some more sour cream ontop of your potatoes and underneath the spring onion, but you have some in the potato already, so it's slight overkill. Less is more, and subtlety is the key! You can, if you desire, eat lamb with mint. It goes rather well, actually. But, not necessary. Thus!

Deliciousness Delivered.